
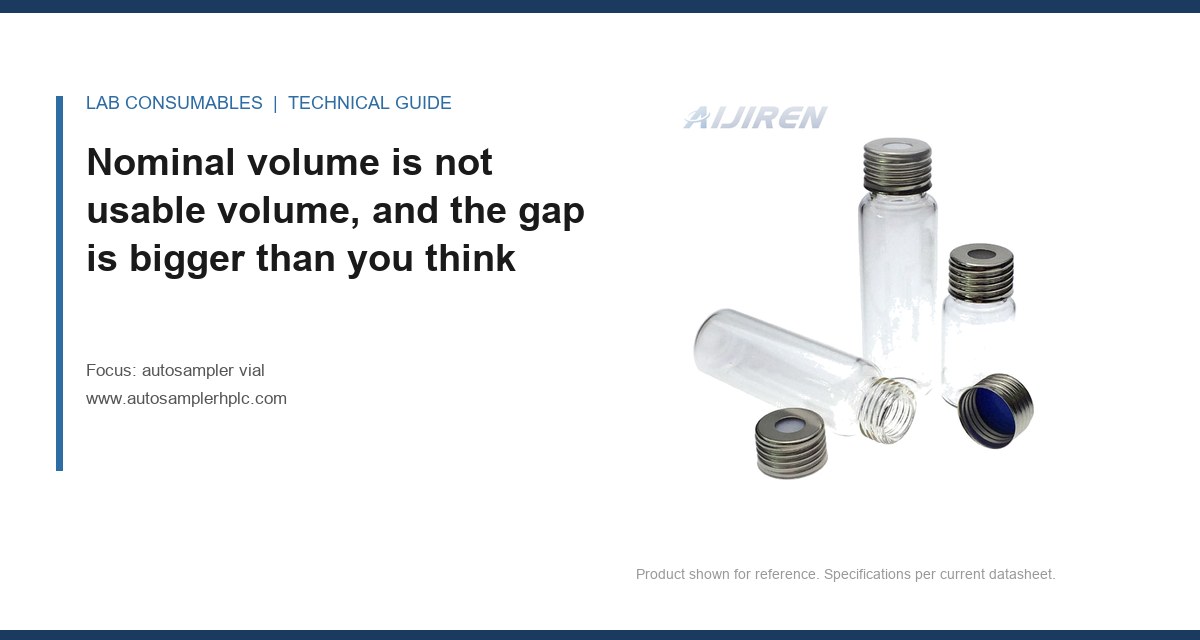
A 2 mL autosampler vial filled to 1.5 mL will run dry at injection 47 on a 10 µL draw with a 2 µL air gap, because the needle tip sits about 1.2 mm above the bottom and the last 100 µL is unreachable. I have watched a sequence abort at injection 48 on exactly that arithmetic. The chemist blamed the instrument. The instrument was fine. The vial was sized by habit, not by volume math, and nobody had counted punctures either.
This guide is about two numbers that should drive the purchase order: the real sample volume you can actually withdraw, and the puncture life you can actually survive for a given injection count. Autosampler vial capacity and puncture life are coupled. Change one and the other moves. If you size a vial by nominal volume alone, you will either waste sample or run dry mid-sequence, and you will replace septa on a schedule that has nothing to do with the needle you are using.
A 2 mL vial is a 12 x 32 mm glass cylinder with a 6 mm neck ID and a crimp or screw finish at 8-425 or 9-425. The nominal 2 mL is the brim-full geometric volume. The usable volume for an autosampler draw is smaller, and the number depends on three things: the height of the needle above the bottom, the dead volume in the neck and shoulder, and the residual film on the wall.
On a standard 12 x 32 mm vial with a 6 mm neck, the shoulder starts around 4 mm above the base. A needle that stops 1.2 mm off the bottom can reach roughly the lower 60 to 70 percent of the cylinder. The rest is either above the needle or trapped in the shoulder. In practice, plan on 1.5 mL usable from a 2 mL vial if you want any margin, and 1.2 mL usable if you want to be safe across a full sequence with a 10 µL draw and a 2 µL air gap.
Working the dead volume number
Dead volume is not a single value. It is the sum of the film on the glass (roughly 20 to 40 µL for aqueous samples in a 12 x 32 mm vial), the liquid below the needle tip (a function of the stop height), and the liquid in the neck if the vial is overfilled and the meniscus sits above the shoulder. For a 2 mL vial, I use 150 µL as a planning dead volume for a needle that stops 1.2 mm off the bottom. For a 1.5 mL vial (11.6 x 32 mm), the same stop height leaves about 100 µL dead. For a 0.3 mL vial (9 mm ID), dead volume drops to roughly 40 µL, but so does total capacity.
The formula I give to anyone sizing a vial is simple:
- Required fill = (injections x draw volume) + (injections x air gap) + dead volume + 10 percent margin
Run that for 100 injections at 10 µL with a 2 µL gap: 1000 + 200 + 150 + 135 = 1,485 µL. A 2 mL vial is fine. Run it for 150 injections: 1500 + 300 + 150 + 195 = 2,145 µL. A 2 mL vial is not fine. You need a 2 mL vial with a wider neck and a lower stop height, or you need to move to a 4 mL vial (15 x 45 mm) or a 10 mL vial. The 4 mL format gives you about 3.2 mL usable, which covers 150 injections with room to spare.
The needle gauge decides how much you can actually draw before the vial runs dry
Needle gauge is not a cosmetic choice. It sets the withdrawal rate you can sustain without cavitation, and it sets the residual volume you cannot reach. A 22 gauge needle (0.72 mm OD, 0.41 mm ID) draws 10 µL in about 0.8 seconds at 25 µL/s. A 26 gauge needle (0.46 mm OD, 0.26 mm ID) draws the same 10 µL in about 1.9 seconds at the same syringe speed, and it is more prone to bubble entrainment at the tip if the vial is nearly empty.
The practical consequence: with a 26 gauge needle, you need a higher stop height to avoid clipping the bottom, and a higher stop height means more dead volume. I plan 1.5 mm stop height for 26 gauge and 1.0 mm for 22 gauge. That 0.5 mm difference is about 15 µL in a 12 x 32 mm vial, which is small until you are running 200 injections and the last ten are the ones that matter.
Puncture-life arithmetic for the septum
Every injection is one puncture. A 100-injection sequence is 100 punctures on one septum. A septum rated for 100 punctures is not rated for 100 punctures at 10 µL with a 22 gauge needle and a 4 mm crimp; it is rated under a specific test condition that the vendor rarely publishes. The number I use for planning is 70 percent of the vendor’s stated puncture count, because the stated count is usually measured with a blunt probe at low speed and a fresh needle.
Here is the arithmetic I actually use for a 96-position autosampler running a 12-hour sequence:
| Parameter | Value | Notes |
|---|---|---|
| Injections per sequence | 96 | Full tray |
| Punctures per septum | 1 | Single injection per vial |
| Vendor septum rating | 100 punctures | Silicone/PTFE, 8 mm |
| Planning rating (70%) | 70 punctures | Conservative |
| Vials per tray before septum change | 70 | 26 vials short of full tray |
| Septa per 1,000 injections | 15 | Rounded up |
That last row is the number that matters for procurement. If you run 1,000 injections a week on a single instrument, you need 15 septa per week, not 10. The difference is 260 septa a year, which is a real line item. If you are running multiple injections per vial (say three), the arithmetic flips: you get three draws per puncture, so 1,000 injections is 334 punctures, which is five septa at the planning rating. That is a 3x reduction in septum consumption and a 3x increase in the risk of a coring failure.
Three injections per vial is the break-even point, and it is not where most labs think it is
The trade-off is straightforward. More injections per vial means fewer vials, fewer septa, and less sample prep. It also means more punctures per septum, more coring risk, and a higher chance that the last injection in the vial is drawn from a volume that has been sitting at the needle tip for hours. The break-even is around three injections per vial for a 2 mL vial with a 10 µL draw, and it moves to two injections per vial for a 1.5 mL vial or a 26 gauge needle.
I have seen labs run 10 injections per vial to save on consumables and then spend the savings on re-runs. The failure mode is not dramatic. The first three injections are clean. The fourth starts to show a 0.5 percent RSD increase. By the eighth, the septum has a visible core and the needle is dragging. By the tenth, the vial is drawing air and the run aborts. The cost of the re-run is roughly 20 times the cost of the extra vial.
When to move up a vial size instead of adding injections
If your method needs 5 injections per sample and you are on a 2 mL vial, you have two choices: move to a 4 mL vial and keep 5 injections, or stay on 2 mL and accept a septum change every 14 vials. The 4 mL vial costs about 30 percent more per unit but eliminates the septum change and the coring risk. For a 96-position tray, the 4 mL format is 15 x 45 mm and fits most trays, but check the tray height before you commit. Some older autosamplers have a 40 mm maximum vial height.
Field case: the sequence that ran dry at injection 47
Symptom: A 96-injection sequence aborted at injection 47 with a “no liquid detected” error on a 2 mL vial filled to 1.5 mL. The method drew 10 µL with a 2 µL air gap and a 1.2 mm stop height.
What the measurement showed: The vial had 1.5 mL at the start. After 46 injections, the remaining volume was 1.5 mL minus (46 x 12 µL) = 1.5 mL minus 552 µL = 948 µL. That should have been plenty. The actual remaining volume was 180 µL. The difference was dead volume: the needle was stopping 1.2 mm off the bottom, but the vial had a shoulder that started 3 mm up, and the last 700 µL was above the needle tip because the vial was sitting in a tray that was not level. The tray was off by 1.5 mm across the 96 positions.
The fix: We leveled the tray, dropped the stop height to 0.8 mm, and moved to a 4 mL vial for that method. The sequence now runs 96 injections with 2.1 mL remaining at the end. The lesson: dead volume is not a constant. It is a function of the vial geometry, the stop height, and the tray level. Measure it on your instrument, not from a spec sheet.
Field case: the septum that failed at puncture 61
Symptom: A lab running 80 injections per tray on a 2 mL vial with a silicone/PTFE septum started seeing a 1.2 percent RSD increase on the last 15 injections of each tray. The septum was rated for 100 punctures.
What the measurement showed: We pulled the septum after 80 punctures and found a core 0.4 mm in diameter and a tear extending 1.1 mm from the puncture site. The needle was a 22 gauge (0.72 mm OD), and the septum was a 1.0 mm silicone with a 0.1 mm PTFE face. The vendor’s 100-puncture rating was measured with a 0.5 mm probe at 10 mm/s. Our needle was 0.72 mm, which is 44 percent larger in diameter and roughly twice the cross-sectional area. The effective rating was closer to 60 punctures.
The fix: We moved to a 1.5 mm silicone septum with a 0.2 mm PTFE face and a 26 gauge needle for that method. The puncture rating at 26 gauge is higher because the needle is smaller, but the draw time doubled, so we adjusted the syringe speed. The RSD settled at 0.3 percent across the full tray.
Decision checklist: sizing the vial to the injection count
Use this checklist before you place a consumables order. It takes about five minutes and it will save you a re-run.
- Count the injections per sample. If it is more than three, size up a vial format or plan a septum change mid-tray.
- Measure the stop height on your instrument. Do not trust the manual. Use a caliper on a dummy vial with the needle in the down position.
- Calculate required fill using the formula above. Add 10 percent margin.
- Check the needle gauge. 22 gauge needs 1.0 mm stop height; 26 gauge needs 1.5 mm. Adjust dead volume accordingly.
- Check the septum rating against the needle gauge. A 100-puncture rating at 0.5 mm probe is not a 100-puncture rating at 0.72 mm needle.
- Verify tray level. A 1 mm tilt across a 96-position tray changes the effective stop height by 1 mm from one side to the other.
- Check the vial height against the autosampler. 4 mL vials are 45 mm; some trays max out at 40 mm.
For the vial itself, the format matters less than the neck finish and the septum. The 8-425 and 9-425 screw finishes are not interchangeable, and a 9 mm septum in an 8 mm cap will leak. If you are sourcing across multiple vendors, check the autosampler vial spec sheet for the neck finish and the septum thickness before you commit. The vial dimension that matters most for capacity is the internal diameter, not the nominal volume.
What the standards actually say about fill volume and puncture life
USP <1058> and the EPA’s SW-846 methods both treat the vial as part of the analytical batch, but neither publishes a fill-volume formula or a puncture-life rating. The closest thing to a standard is the GPI 9-425 finish specification, which sets the thread pitch and the cap torque at 0.6 to 0.9 N·m for a screw cap. Over-torque at 1.2 N·m deforms the septum and reduces the puncture life by roughly 20 percent in my experience. Under-torque below 0.4 N·m lets the septum lift during the draw and pulls air into the needle.
For headspace work, the fill volume is a different calculation entirely. A 20 mL headspace vial is filled to 5 mL or 10 mL to leave a headspace ratio, and the puncture life is a function of the crimp, not the screw thread. If you are running headspace, check the headspace vial crimp dimensions against your crimper before you buy. A 20 mm crimp that is 0.2 mm out of spec will leak at 80 °C.
For GC work, the vial is usually a 2 mL or a 1.5 mL format, and the puncture life is dominated by the septum, not the glass. The GC vial that works for a 10 µL draw at 250 °C is not the same vial that works for a 1 µL split injection at 280 °C. Check the septum temperature rating before you commit. A silicone septum rated to 200 °C will bleed at 250 °C, and the bleed shows up as a baseline rise, not a failed injection.
If you need the vendor’s own numbers, the Agilent chromatography consumables catalog publishes septum puncture ratings and temperature limits, and Thermo Fisher’s chromatography and sample handling documentation includes the stop-height specifications for their autosamplers. Restek’s technical resources are the best source I have found for the relationship between needle gauge and septum coring.
Troubleshooting checklist for a sequence that runs dry or drifts
When a sequence aborts or the RSD climbs, work through this list in order. It is faster than swapping parts.
- Check the remaining volume. If it is less than the dead volume plus 10 percent, the vial is undersized. Move up a format.
- Check the stop height. A needle that stops 2 mm off the bottom leaves 400 µL unreachable in a 12 x 32 mm vial.
- Check the tray level. A 1.5 mm tilt across 96 positions is enough to abort a sequence at injection 47.
- Check the septum for coring. A visible core larger than 0.3 mm means the puncture count has exceeded the effective rating for that needle gauge.
- Check the cap torque. Below 0.4 N·m, the septum lifts. Above 1.2 N·m, the septum deforms and the puncture life drops.
- Check the needle gauge against the septum rating. A 0.72 mm needle on a septum rated at 0.5 mm probe is a 40 percent reduction in puncture life.
The decision rule is simple. Size the vial so the required fill is at least the injection count times the draw volume plus 150 µL of dead volume plus 10 percent margin. Plan the septum at 70 percent of the vendor’s puncture rating, and drop that to 50 percent if your needle is larger than 0.5 mm OD. If the arithmetic puts you above 1.5 mL usable, move to a 4 mL vial. If it puts you above 3.2 mL, move to a 10 mL vial. Do not add injections per vial to save on consumables unless you have measured the coring rate on your own needle.
References & further reading
Related resources from our lab consumables network:
- Autosampler Vial at autosamplerhplc.com
- Vial at vials-filters.com
- Headspace Vial at headspacevialsupplier.com
- Gc Vial at gcvialfactory.com
External references and standards: