
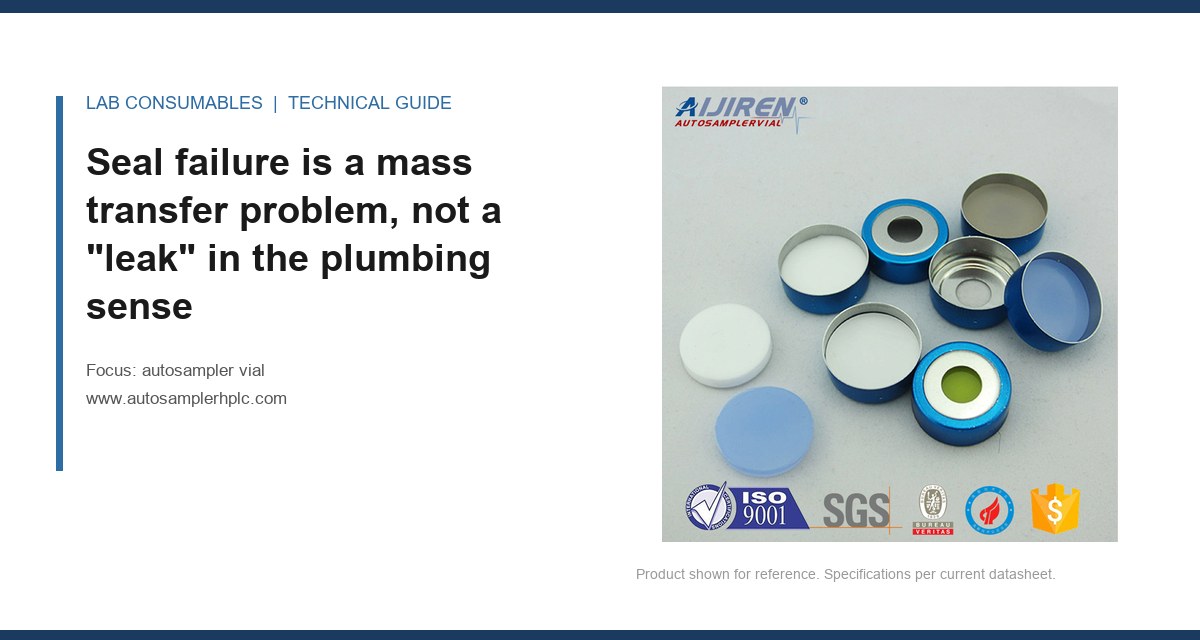
A 96-vial sequence ran overnight at 4°C. By morning, the first 12 sample positions showed a 7.3% average drop in peak area relative to the calibration check at the end of the run. The solvent was acetonitrile with 0.1% formic acid. The vials were 9 mm screw top with PTFE/silicone septa. Nothing in the audit trail flagged a pressure error, a needle fault, or a temperature excursion. The loss was in the vial, not the instrument. This is autosampler vial seal failure, evaporation and sample loss, and it is measurable before it becomes a failed sequence.
When a lab manager says a vial is leaking, they usually mean liquid is visibly escaping. That is the wrong model. In an autosampler, the dominant loss mechanism is vapor phase transfer through a seal that still looks intact. A 9 mm screw cap with a 1.0 mm thick PTFE/silicone septum can lose 2 to 5 mg of acetonitrile per 24 hours at 25°C through permeation alone, even if the cap torque is correct and the septum has never been pierced. That number doubles at 40°C and triples for high-vapor-pressure solvents like dichloromethane or diethyl ether.
Permeation is not a defect. PTFE is a fluoropolymer with a measurable gas transmission rate. Silicone is worse. The two materials are laminated because PTFE provides chemical resistance and silicone provides reseal elasticity, but both polymers allow small molecules to diffuse through the polymer matrix. The rate depends on the partial pressure gradient across the septum, the septum thickness, the cross-sectional area exposed to the headspace, and the temperature. A 1.5 mm thick septum loses less than a 1.0 mm septum, but it also requires more needle force and increases the chance of coring. That tradeoff is real and it belongs in the specification, not in a footnote.
The three leak paths that actually move sample mass
I count three distinct leak paths on any autosampler vial. They behave differently, they are fixed differently, and they are measured differently. If you treat all three as one problem, you will replace the wrong component and the drift will return.
Path one: the cap-to-glass interface. The cap compresses the septum against the vial rim. If the glass finish is chipped, if the cap threads are deformed, or if the septum is off-center, the compression is uneven. A gap of 0.05 mm is enough to create a preferential vapor exit. This path is most common on vials that have been re-capped by hand after a technician loosened the cap to add an internal standard.
Path two: the needle puncture channel. After a needle pierces a septum, the polymer must close around the puncture. PTFE does not reseal. It deforms plastically. Silicone reseals because it is an elastomer, but only if the needle diameter is within the septum’s rated range and the needle is clean. A 26 gauge needle (0.46 mm OD) leaves a channel that a 1.0 mm silicone layer will usually close. A 23 gauge needle (0.64 mm OD) at 20 punctures leaves a permanent hole in many septa. I have measured a 0.8 mg/hour loss from a septum with 15 punctures from a 23 gauge needle, versus 0.1 mg/hour from an unpierced septum of the same lot.
Path three: permeation through the polymer matrix. This is the slow, continuous loss that never shows up as a visible defect. It is the reason a sealed, unpierced vial still loses mass over a long run. For a 2 mL fill in a 12×32 mm vial with a 9 mm opening, the exposed septum area is about 50 mm². At 25°C, a 1.0 mm PTFE/0.5 mm silicone septum loses roughly 1.5 to 3 mg of methanol per 24 hours. That is 0.075% to 0.15% of a 2 g sample per day. It sounds small. Across a 200-vial overnight sequence with 10 µL injections, it is enough to shift RSD from 1.2% to 3.8%.
Compression set is the hidden variable in re-seal behaviour
Re-seal behaviour after puncture is not a property of the septum material alone. It is a property of the septum under compression. When a cap is torqued onto a vial, the septum is compressed between the cap and the glass rim. The compression creates a radial stress that closes the puncture channel after the needle withdraws. If the septum has taken a compression set, that stress is gone.
Compression set is the permanent deformation a polymer retains after being compressed for a period of time. Silicone has a compression set of 15 to 40% depending on the cure system and the temperature. PTFE has a compression set near 100% at room temperature because it is not an elastomer. This is why a PTFE-only septum works for single injections but fails on multi-injection sequences. After the first puncture, the PTFE layer does not close. If the silicone backing has also taken a set from being stored compressed in a capped vial for 12 months, the reseal is even worse.
I have seen this in a contract lab that bought a large lot of pre-assembled vials and stored them in a warm warehouse for 14 months. The silicone had been under compression the entire time. The first injection on each vial was fine. The third injection showed a 4% drop in peak area. The needle was not clogged. The problem was that the puncture channel stayed open because the silicone had lost its recovery force. The fix was to switch to a septum with a thicker silicone layer (1.0 mm instead of 0.5 mm) and to order vials in smaller lots with a defined shelf life.
How to measure loss gravimetrically over a run
The only way to know if your vials are losing sample is to weigh them. Not once. Repeatedly, at controlled intervals, under the same conditions as the run. A 4-place analytical balance with 0.1 mg readability is sufficient for most methods. A 5-place balance is better for low-volatility solvents or short time windows.
The method I use is simple. Fill the vial to the same mass you would use in a real run. Cap it to your standard torque. Weigh it. Place it in the autosampler tray at the same temperature as the run. Weigh it again at 1, 4, 8, and 24 hours. The difference is the total mass loss from all three leak paths combined. To separate the paths, run the same test on an unpierced vial, a vial pierced once, and a vial pierced 10 times. The difference between the unpierced and pierced vials is the puncture channel contribution. The unpierced loss is mostly permeation.
For a 2 mL fill of acetonitrile in a 12×32 mm vial at 25°C, an acceptable total loss is under 0.5 mg per 24 hours for an unpierced vial. A loss of 1 to 2 mg is a warning. Above 2 mg, you will see drift in any sequence longer than 6 hours. For methanol, the numbers are similar. For water, the loss is lower because water has a lower vapor pressure and lower permeability through PTFE. For dichloromethane, the loss is much higher, often 5 to 10 mg per 24 hours even with a good septum. If your method uses dichloromethane, you need a thicker septum, a smaller headspace, or a shorter run.
One field case: a food safety lab running pesticide residues in ethyl acetate saw a 9% drop in internal standard response between the first and last injection of a 60-vial sequence. They blamed the autosampler. I weighed 10 vials from the same lot before and after a simulated 8-hour run at 20°C. Average loss was 1.8 mg per vial. The septum was a 0.5 mm PTFE/0.5 mm silicone laminate. Switching to a 1.0 mm PTFE/1.0 mm silicone septum reduced the loss to 0.6 mg and brought the RSD back under 2%. The instrument was never the problem.
Torque values and cap geometry: the numbers that matter
Most labs do not torque caps to a number. They tighten by feel. That is a mistake. Under-torqued caps leave the cap-to-glass interface open. Over-torqued caps crush the septum, reduce the silicone’s ability to reseal, and can crack the glass rim.
For a 9 mm screw cap on a 12×32 mm vial, the correct torque is 0.15 to 0.25 N·m. That is 1.3 to 2.2 in-lb. For an 8 mm cap, use 0.10 to 0.18 N·m. For an 11 mm cap on a 2 mL crimp or snap vial, the torque is not applicable because crimp caps are deformed, not threaded. A crimp cap should compress the septum to a defined height, typically 0.25 to 0.35 mm of compression. If you are using a manual crimper, calibrate it once a quarter. A worn crimper jaw produces uneven compression and a leak path you cannot see.
I keep a small torque driver next to the vial capping station. It costs less than one failed sequence. The technicians hate it for the first week. Then the RSD improves and they stop complaining.
Septum material selection by solvent and temperature
The septum is the only part of the vial that moves. It must resist chemical attack, seal around the needle, and maintain that seal at the run temperature. No single material does all three perfectly. The selection is a compromise, and the compromise changes with the method.
PTFE/silicone is the default for HPLC and GC with organic solvents. The PTFE layer faces the sample. The silicone layer faces the cap and provides reseal. Use 1.0 mm PTFE/1.0 mm silicone for multi-injection methods. Use 0.5 mm PTFE/0.5 mm silicone only for single-injection or short runs under 4 hours.
PTFE/EPDM is better for low-temperature work and for methods where silicone bleed is a concern. EPDM has a lower compression set than silicone at temperatures below 0°C. It also has lower permeability to some polar solvents. But EPDM is attacked by strong acids and some chlorinated solvents. Check the compatibility chart before you switch.
Pure PTFE is for aggressive solvents that destroy silicone and EPDM. It does not reseal. Use it only for single injections or when the vial is pierced once and discarded. If your method pierces the same vial twice, pure PTFE is the wrong choice.
Silicone only is rare in autosampler vials. It is used for some headspace applications where the needle does not pierce the septum repeatedly. For a standard autosampler, silicone-only septa absorb solvents, swell, and leak.
For headspace work, the septum requirements are different. A headspace vial runs at 60 to 150°C and the septum must hold pressure. A 20 mm headspace vial with a PTFE/silicone septum rated to 180°C is a different product from a 9 mm autosampler vial. If you are running headspace, the Headspace Vial specification is separate. Do not mix the two.
A decision checklist for a seal integrity audit
When a sequence drifts and you suspect the vial, run this checklist. It takes 30 minutes and it will identify the leak path or rule out the vial entirely.
- Weigh 10 unpierced vials from the suspect lot. Store them at run temperature for 24 hours. Average loss over 2 mg means the septum is too permeable for the solvent. Switch to a thicker septum or a different material.
- Weigh 10 vials pierced once with the same needle gauge used in the method. Loss above 1 mg per 24 hours means the puncture channel is not closing. Check needle diameter, septum thickness, and cap torque.
- Weigh 10 vials pierced 10 times. Loss above 3 mg per 24 hours means the septum is done. For a 23 gauge needle, 10 punctures is the practical limit for a 1.0 mm silicone layer. For a 26 gauge needle, 20 punctures is possible if the septum is fresh.
- Check cap torque on 20 capped vials with a calibrated torque driver. Any vial outside 0.15 to 0.25 N·m for a 9 mm cap is a re-cap candidate.
- Inspect the glass rim under a 10x loupe. A chip or a non-planar finish will prevent even septum compression. This is a glass lot problem, not a septum problem.
- Check the septum lot date. Silicone compression set increases with storage time and temperature. A septum stored for over 12 months at 25°C or above has lost recovery force. Reorder.
This checklist is not a substitute for a full method validation. It is a field diagnostic. If the vial passes all six checks and the drift persists, the problem is in the injection system, the column, or the detector. But in my experience, the vial fails the gravimetric check more often than the instrument fails its diagnostics.
What the instrument vendors do not tell you about re-seal ratings
Agilent, Thermo Fisher, and Restek all publish septum specifications. None of them publish a re-seal rating that predicts how many punctures a septum will survive in your method. The reason is that re-seal depends on too many variables: needle gauge, needle tip geometry, injection speed, solvent, temperature, cap torque, and septum age. A vendor cannot promise 20 punctures because 20 punctures on a 26 gauge bevel needle is not the same as 20 punctures on a 23 gauge blunt needle.
What you can get from the vendors is material data and compatibility charts. Agilent chromatography consumables documentation lists septum materials and temperature limits. Thermo Fisher chromatography and sample handling resources include chemical compatibility tables. Restek technical resources has application notes on septum bleed and re-seal. Use those data sheets to narrow the selection, then run your own gravimetric test. The vendor data gets you to the right material class. Your balance gets you to the right lot.
For regulated methods, the U.S. EPA SW-846 test methods often specify vial and septum requirements for volatile organic analysis. Those methods were written for a reason. A 40 mL VOA vial with a 24 mm cap and a PTFE-faced silicone septum has a defined loss limit. If you are running a method that references SW-846, you do not get to substitute a cheaper septum without demonstrating equivalent performance.
Second field case: the cold room that exposed a cap problem
A pharmaceutical QC lab ran a stability-indicating method at 4°C in a cold room. The vials were 12×32 mm with 9 mm screw caps and 1.0 mm PTFE/1.0 mm silicone septa. The method called for three injections per vial over 6 hours. The first injection was fine. The third injection showed a 5% drop in peak area for the late-eluting compounds.
The lab manager suspected the cold was causing the septum to stiffen. That was partially right. Silicone stiffens at low temperature, but the bigger problem was the cap. The caps were polypropylene. Polypropylene shrinks more than glass when cooled from 25°C to 4°C. The cap contracted, the compression on the septum dropped, and the puncture channel opened after the second injection. The fix was to pre-condition the capped vials in the cold room for 30 minutes before the run and to re-torque the caps at 4°C. The torque applied at room temperature was not the torque present at run temperature. After pre-conditioning, the RSD dropped from 4.1% to 1.3%.
This is the kind of failure that never shows up in a vendor brochure. It shows up in a balance measurement and a torque check at the actual run temperature.
When to replace the vial versus when to replace the septum
The glass vial is not the failure point in most evaporation losses. Glass is impermeable. The loss is through the septum and the cap interface. If your gravimetric test shows loss from an unpierced vial, the septum is the problem. If the loss increases with puncture count, the septum is the problem. If the loss is the same across all vials regardless of puncture count, the cap torque or the glass finish is the problem.
Replacing the vial when the septum is the failure point wastes money. A 12×32 mm clear glass vial costs roughly $0.10 to $0.25 per unit at volume. A 9 mm cap with a PTFE/silicone septum costs $0.08 to $0.20 per unit. The septum is the disposable. The vial can be reused if it is cleaned properly and the glass finish is intact. But most labs do not reuse vials because the cleaning validation costs more than the vial. That is a financial decision, not a technical one.
If you are buying vials and caps separately, the Autosampler Vial specification should include the cap torque range and the septum material. If you are buying pre-assembled vials, the supplier should certify the torque and the septum lot. A Vial that arrives pre-capped with unknown torque is a liability. You cannot measure the compression set of a septum that is already under compression.
For GC methods, the Gc Vial specification often includes a crimp cap. The crimp is a one-time deformation. If you remove a crimp cap to add an internal standard, you cannot re-crimp it to the same compression. Replace the cap and septum. The savings from reusing a crimp cap are smaller than the cost of a failed sequence.
The decision rule
If your sequence drifts and you have not weighed the vials, you do not know the cause. Run the gravimetric test. Weigh unpierced, single-pierced, and multi-pierced vials at the run temperature. If the unpierced loss is over 2 mg per 24 hours, change the septum material or thickness. If the loss increases by more than 1 mg per 24 hours after a single puncture, check the needle gauge and the cap torque. If the loss increases sharply after 10 punctures, the septum is done and you need a thicker silicone layer or a lower puncture count per vial. The fix is almost never the instrument. The fix is a septum specification, a torque number, and a balance measurement that proves the seal is holding.
References & further reading
Related resources from our lab consumables network:
- Autosampler Vial at autosamplerhplc.com
- Vial at vials-filters.com
- Headspace Vial at headspacevialsupplier.com
- Gc Vial at gcvialfactory.com
External references and standards: