
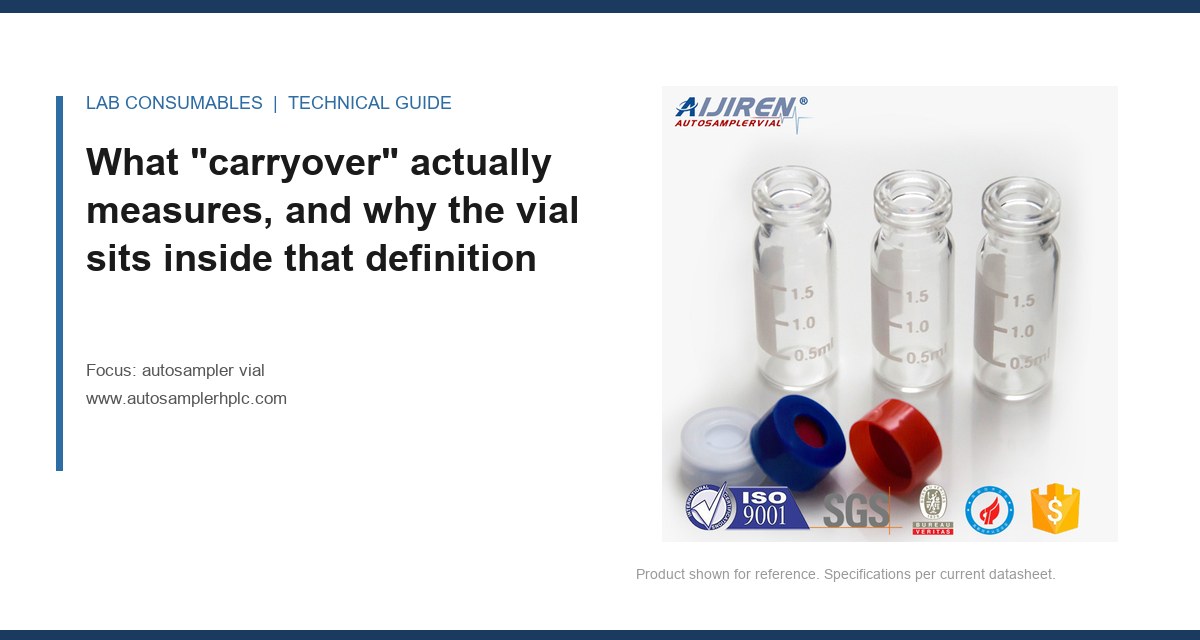
I spent three weeks chasing a 0.9% carryover on a 2 mL vial method last year. The wash cycle ran 6 seconds of methanol, the needle rinsed on the outside, the injection port was clean, and the blank still came back with a peak at the retention time of the analyte. The instrument was not the problem. The vial was. Specifically, the vial was acting as a reservoir, holding a few microlitres of sample in a place the wash solvent never reached, and then releasing it into the next injection. That is the failure mode I want to walk through here, because it is common, it is misdiagnosed as an instrument fault, and it is fixable in about twenty minutes once you know where to look.
Carryover is the fraction of a previous injection that shows up in the next one. USP <621> sets a working limit of not more than a defined percentage of the previous peak area in a blank, and most regulated methods tighten that to 0.05% to 0.1% for the analyte of interest. When a lab reports 0.6% carryover on a method that historically ran at 0.02%, the first instinct is to blame the needle, the loop, or the injection valve. Those are all real carryover sources. But they are also the ones the wash cycle is designed to address, and if the wash cycle is doing its job on the fluid path, the residual almost always traces back to the sample container.
The reason is simple geometry. An autosampler wash cycle flushes the inside of the needle, the outside of the needle, the injection loop, and (on some instruments) the seat and the rotor seal. It does not flush the inside of the autosampler vial. Whatever sample sits above the liquid line, on the inner wall, in the septum, or in the headspace of that vial stays there for the entire run and is available to contaminate the next aspiration. The wash cycle is a fluid-path intervention. The vial is a container. They are not the same problem, and treating them as one is how you end up replacing a needle that was never the cause.
The three reservoirs inside a vial that a wash cycle cannot touch
Reservoir 1: the inner wall above the liquid line
When the autosampler needle descends, aspirates, and withdraws, a thin film of sample clings to the outside of the needle. On withdrawal, some of that film transfers to the inner wall of the vial neck and the septum. If the vial is a standard 12 x 32 mm vial with a 6 mm neck ID and the sample volume is 1.5 mL in a 2 mL vial, the liquid line is roughly 22 mm above the base. The wetted wall above that line is 6 to 10 mm of glass, and it stays wet with sample for the life of the vial. On the next aspiration, if the needle descends to a fixed depth and the sample volume has dropped (because the previous injection removed 10 to 100 microlitres), the needle tip can pass through that wetted zone and pick up residue before it reaches the liquid.
The fix is depth control, not more wash. Set the needle depth to 2 to 3 mm above the bottom of the vial for a 1.5 mL fill, and confirm the autosampler is using a bottom-sensing or calibrated depth rather than a fixed default. On an Agilent 1260 or 1290 autosampler, the injection depth is a method parameter and it is frequently left at the factory default. Check it. On a Thermo Vanquish or Ultimate 3000, the same parameter exists under “injection” in the method. A 1 mm error in depth on a 2 mL vial with a 300 microlitre residual is enough to put the needle tip into the wetted wall zone.
Reservoir 2: the septum
Silicone and silicone/PTFE septa absorb analyte. This is not a defect; it is the material doing what an elastomer does. A 10 mm silicone septum with a 45 Shore A durometer will take up a measurable quantity of a hydrophobic analyte from the vapour phase in the headspace of the vial, and it will release it slowly over the next several injections. If your method uses a 2 mL vial with a 1.5 mL fill and a 0.5 mL headspace, that headspace is saturated with analyte vapour at the vial’s temperature. The septum is the coldest surface the vapour sees. It is a condenser.
The numbers matter here. A silicone septum 3 mm thick and 10 mm in diameter has a surface area of about 78 mm² on the sample side and a volume of roughly 236 mm³. At 25 °C, a typical hydrophobic analyte has a septum/headspace partition coefficient that puts a few tenths of a microgram into the septum after a 10-minute dwell. That is small in absolute terms and enormous relative to a 0.05% carryover limit on a 1 microgram injection. PTFE-faced septa reduce this substantially because the PTFE face is a barrier, but the PTFE is only 0.1 to 0.2 mm thick and it is punctured on every injection. After 50 to 100 punctures, the PTFE face is a sieve and the silicone underneath is exposed. If your septum has been in service for more than a day of injections, it is a candidate for the carryover source.
Reservoir 3: the headspace itself
This is the one that catches people. In a 2 mL vial with 1.5 mL of sample, the headspace is 0.5 mL. That headspace is in diffusive contact with the sample and reaches equilibrium with the analyte at the vial’s temperature. When the needle punctures the septum and descends, the headspace gas is displaced through the needle bore or around it, and a fraction of that gas enters the needle. On the next injection, if the vial is the same vial (a common practice in short sequences where the same vial is injected multiple times), the headspace has been disturbed and re-equilibrated, and the composition of the next aspiration is not the composition of the first. This is a vial-level carryover effect that no wash cycle addresses because the wash cycle runs between injections, not between aspirations from the same vial.
For headspace work specifically, the geometry is different and the headspace vial is a separate specification for a reason: a 20 mL crimp vial with a 10 mL fill has a 10 mL headspace and a much larger septum, and the equilibration times are measured in tens of minutes, not seconds. If you are running headspace on a 2 mL vial because the method was “adapted,” you have created a reservoir with no thermal mass and no equilibration time, and the carryover will be erratic and method-dependent.
Why the wash cycle makes the problem worse, not better
Here is the counterintuitive part. A wash cycle that uses a strong solvent (methanol, acetonitrile, or a methanol/water mix) on the needle can increase apparent carryover from the vial, because the wash solvent wets the needle and the septum, and a wet septum desorbs analyte more readily into the next aspiration than a dry one. I have seen methods where turning the wash off dropped carryover from 0.4% to 0.15%, which is the opposite of what the operator expected. The wash was not cleaning the reservoir; it was mobilising it.
The wash solvent choice also matters. A 50:50 methanol/water wash on a method with a hydrophobic analyte is a good needle rinse and a poor septum rinse, because the methanol partitions into the silicone and swells it slightly, increasing the diffusion rate of analyte out of the septum on the next injection. A wash of 90:10 water/methanol is a worse needle rinse and a better septum rinse. If you are chasing vial-sourced carryover, the wash solvent is a variable you can turn down, not up.
A diagnostic sequence that isolates the vial from the instrument
Before you touch the instrument, run this sequence. It takes about 90 minutes and it will tell you whether the vial is the reservoir.
- Baseline blank. Inject a blank from a fresh vial with a fresh septum. Record the peak area at the analyte retention time. Call it A0.
- High-concentration injection, same vial. Inject a high-concentration standard (10x your calibration top) from a fresh vial. Then inject a blank from a different fresh vial. Record the blank peak area. Call it A1. A1/A0 tells you instrument carryover.
- High-concentration injection, then blank from the same vial. Inject the high standard, then inject a blank drawn from the same vial (same septum, same headspace). Record the area. Call it A2. A2/A1 tells you vial-sourced carryover.
- Septum swap. Repeat step 3 with a fresh septum on the same vial body. Call it A3. If A3 is significantly lower than A2, the septum is the reservoir.
- Depth test. Repeat step 3 with the needle depth raised 3 mm. Call it A4. If A4 is lower than A2, the wetted wall is the reservoir.
If A2/A1 is greater than 2, the vial is contributing more carryover than the instrument, and the rest of this article applies. If A2/A1 is close to 1, the vial is not the problem and you should look at the injection valve, the loop, or the needle seat. In my experience, roughly 60 to 70% of “instrument carryover” complaints on 2 mL vial methods resolve at step 4 or step 5.
Selection criteria: what a low-carryover vial specification looks like
Not all autosampler vials are equal as reservoirs, and the differences are in the drawing, not the datasheet marketing. Here is what I look for, with numbers.
| Parameter | High-carryover spec | Low-carryover spec | Why it matters |
|---|---|---|---|
| Vial neck ID | 4.6 mm | 6.0 mm | Wider neck reduces wall contact on needle withdrawal |
| Vial height | 32 mm (standard) | 32 mm with a 1.5 mL fill line marked | Depth control is easier with a fill line |
| Septum material | Silicone, 45 Shore A | Silicone/PTFE, 0.2 mm PTFE face | PTFE face reduces absorption until punctured |
| Septum thickness | 3.0 mm | 1.5 mm | Thinner septum = less reservoir volume |
| Septum durometer | 45 Shore A | 55 Shore A | Harder septum reseals better, less coring |
| Crimp or screw | Crimp (single use) | Screw with a PTFE-lined cap | Screw caps can be re-sealed without a new septum if the septum is intact |
| Glass grade | Type I borosilicate, 33 expansion | Type I borosilicate, USP <660> compliant | Lower extractables, less adsorption |
| Fill volume | 1.8 mL in a 2 mL vial | 1.0 to 1.5 mL in a 2 mL vial | Larger headspace = more vapour reservoir, so fill to 1.5 mL for a 2 mL vial |
The single most effective change I have made on a carryover-prone method is switching from a 3.0 mm silicone septum to a 1.5 mm silicone/PTFE septum in a screw-top vial with a PTFE-lined cap, and torquing the cap to 1.5 to 2.0 inch-pounds with a torque wrench. The PTFE face is a barrier until it is punctured, the thinner septum holds less analyte, and the screw cap can be re-tightened without re-puncturing the septum if the method allows it. The trade-off is puncture count: a 1.5 mm silicone/PTFE septum is good for about 50 to 75 punctures before the PTFE face is compromised, versus 100 to 150 for a 3.0 mm silicone septum. If your method runs 200 injections from one vial, you need to plan for a septum change mid-sequence, or use a vial with a pre-slit septum and accept the slightly higher evaporation rate.
For GC methods, the same logic applies but the numbers shift. A GC vial is typically a 2 mL crimp or screw vial with a 11 mm crimp or 9 mm screw thread, and the septum is usually a silicone/PTFE laminate because GC inlets are hot and a pure silicone septum bleeds. The GPI 9 mm screw thread and the GPI 11 mm crimp are the two standards you will see, and the septum thickness for GC is usually 1.0 to 1.3 mm. The lower thickness is a carryover advantage and a puncture-count disadvantage. If you are running a GC method with a split/splitless inlet at 250 °C, the septum is also under thermal load, and a septum that has been at 250 °C for an hour is a different material than one that has not. Plan the septum change at 50 punctures, not 100, for hot inlets.
Operational precautions that actually reduce vial-sourced carryover
Cap torque
Over-torquing a screw cap deforms the septum and creates a gap between the septum and the vial neck, which is a reservoir. Under-torquing leaves the septum loose and the headspace leaks. The window is narrow: 1.5 to 2.0 inch-pounds (0.17 to 0.23 N·m) for a 9 mm screw cap, and 2.0 to 2.5 inch-pounds (0.23 to 0.28 N·m) for an 11 mm crimp cap. Use a torque wrench, not fingers. I have seen a lab drop carryover from 0.3% to 0.04% by switching from hand-tightened caps to a calibrated torque wrench, with no other change.
Fill volume and headspace ratio
For a 2 mL vial, fill to 1.5 mL and no more than 1.8 mL. The 0.2 to 0.5 mL headspace is the vapour reservoir, and a larger headspace means more analyte vapour available to condense on the septum. For a 1.5 mL vial, fill to 1.0 mL. For a 0.3 mL micro-vial, fill to 0.2 mL and accept that the headspace ratio is poor; micro-vials are for volume-limited samples, not for low-carryover methods.
Septum conditioning
A fresh septum out of the bag has residual manufacturing volatiles and a slightly tacky surface. Condition it before use: 30 minutes at 100 °C in a clean oven for silicone, or 15 minutes at 60 °C for silicone/PTFE (the PTFE face does not need high temperature and the silicone backing can yellow above 150 °C). Conditioning reduces the first-injection artefact and the initial absorption rate. It does not eliminate the reservoir; it just makes the first few injections more consistent.
Vial position in the tray
This sounds trivial and it is not. A vial that sits in a tray position exposed to the autosampler’s internal air flow will have a different septum temperature than a vial in a covered position, and the septum absorption is temperature-dependent. On a 1260 autosampler with the tray cover open, the front-row vials run 2 to 4 °C warmer than the back rows. If your carryover is position-dependent, the tray cover is part of the problem. Close it.
Troubleshooting checklist for vial-sourced carryover
- Confirm the carryover is vial-sourced using the A0/A1/A2 sequence above. Do not skip this step.
- Check needle depth. Target 2 to 3 mm above the vial bottom for a 1.5 mL fill. Verify the method parameter, not the default.
- Check septum age. More than 50 punctures on a 1.5 mm septum or 100 on a 3.0 mm septum is a change point.
- Check cap torque with a torque wrench. 1.5 to 2.0 in-lb for 9 mm screw, 2.0 to 2.5 in-lb for 11 mm crimp.
- Check fill volume. 1.5 mL in a 2 mL vial; 1.0 mL in a 1.5 mL vial.
- Check wash solvent. If the wash is a high-methanol mix and the analyte is hydrophobic, try a lower-methanol wash and see if carryover drops.
- Check vial lot. A new lot with a different septum durometer can shift carryover by 0.1% or more. Keep a retained sample of the previous lot for comparison.
- Check the septum material against the analyte. Silicone absorbs hydrophobic analytes; PTFE-faced septa are better until punctured; butyl is worse for most HPLC work.
- Check the vial glass. Type I borosilicate with low extractables is the baseline. A vial with visible internal scratches holds more sample on the wall.
- Check the tray cover and temperature. A 2 to 4 °C septum temperature difference between tray positions is enough to move carryover on a marginal method.
When the vial is not the reservoir, and what to look at instead
If the A0/A1/A2 sequence shows the vial is contributing less than half the carryover, the reservoir is in the instrument. The usual suspects, in order of frequency in my experience:
- Injection loop and rotor seal. A 20 microlitre loop with a worn rotor seal holds a film of sample that the wash cycle does not reach. Replace the rotor seal at the manufacturer’s interval (typically every 6 to 12 months or 20,000 injections on an Agilent 1260).
- Needle seat. The seat is a small volume below the needle that the wash cycle flushes on some instruments and not on others. Check the wash port alignment.
- Needle outer surface. A needle with a scratched or pitted outer surface holds more sample than a polished one. Inspect under a loupe at 10x.
- Wash solvent quality. HPLC-grade methanol is not the same as LC-MS grade. A wash solvent with 0.5 ppm of the analyte will show up as carryover on a sensitive method.
For instrument-specific maintenance intervals, the manufacturer’s consumables documentation is the reference: Agilent publishes rotor seal and needle seat lifetimes in its chromatography consumables and columns catalogue, and Thermo Fisher’s chromatography and sample handling documentation covers the Vanquish and Ultimate 3000 maintenance intervals. Restek’s technical resources are useful for GC septum and inlet maintenance, and EPA SW-846 methods specify the vial and septum requirements for waste and materials testing, which is a good check against your own method.
Recommendation: a low-carryover vial configuration for HPLC and GC
For an HPLC method with a 2 mL vial and a 1.5 mL fill, I would specify: 12 x 32 mm clear Type I borosilicate vial, 6.0 mm neck ID, 9 mm screw thread (GPI 9), 1.5 mm silicone/PTFE septum, PTFE-lined screw cap, torqued to 1.5 to 2.0 inch-pounds, needle depth 2 to 3 mm above the bottom, septum changed every 50 punctures. That configuration gets most methods below 0.05% carryover without instrument changes.
For a GC method with a split/splitless inlet at 250 °C, I would specify: 2 mL clear Type I borosilicate vial, 11 mm crimp (GPI 11), 1.0 mm silicone/PTFE septum, aluminium crimp cap with a PTFE-faced seal, crimped to 2.0 to 2.5 inch-pounds, septum changed every 50 punctures, septum conditioned 15 minutes at 60 °C before use. The thinner septum is the carryover advantage; the 50-puncture change interval is the cost.
If the method is a headspace method, do not use a 2 mL vial. Use a 20 mL crimp headspace vial with a 10 mL fill and a 3.0 mm silicone/PTFE septum, and follow the equilibration time in the method. The 2 mL vial is a reservoir with no thermal mass and no equilibration time, and the carryover will be method-dependent and irreproducible.
Takeaway
Carryover that survives a wash cycle is telling you the reservoir is not on the fluid path. In a 2 mL vial method, the three reservoirs a wash cycle cannot reach are the wetted wall above the liquid line, the septum, and the headspace, and the fastest way to find out which one is active is the A0/A1/A2 sequence with a septum swap and a depth change. Fix the depth first, then the septum, then the cap torque. If carryover is still above your limit after that, the vial is not the reservoir and you should be looking at the rotor seal and the needle seat. The vial is a container, not a flow cell, and the wash cycle has never been able to clean it.
References & further reading
Related resources from our lab consumables network:
- Autosampler Vial at autosamplerhplc.com
- Vial at vials-filters.com
- Headspace Vial at headspacevialsupplier.com
- Gc Vial at gcvialfactory.com
External references and standards: