
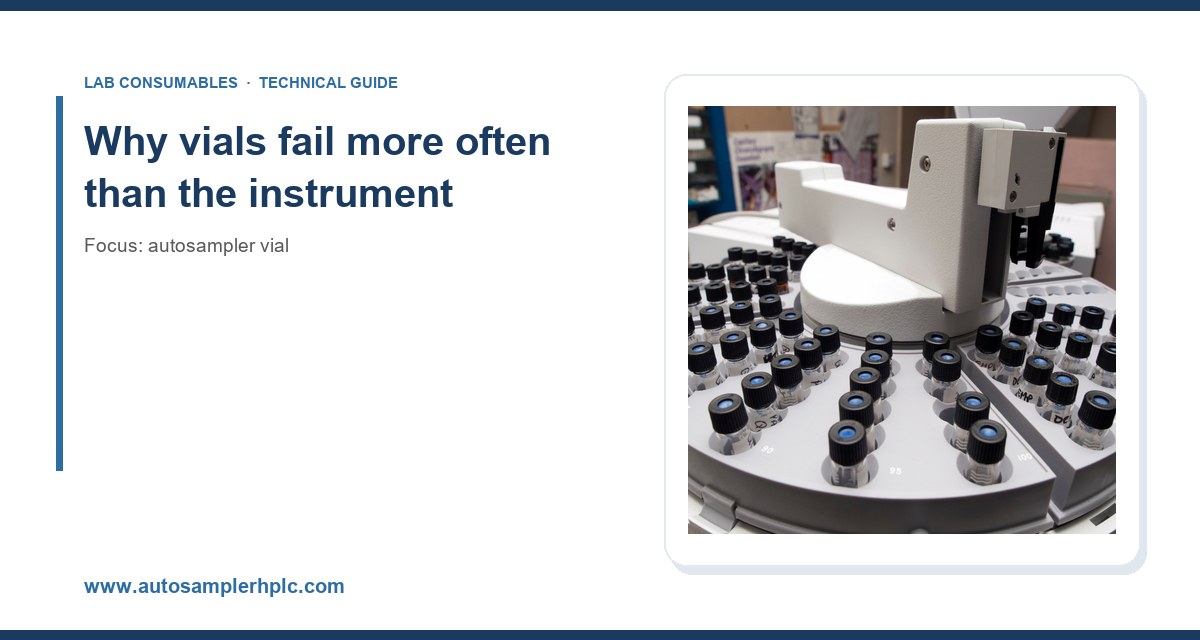
I have spent the last fifteen years on the production floor and in the field, and I can tell you that most autosampler downtime I have seen did not come from a failed pump or a burned-out detector. It came from a two-dollar glass vial. A cracked neck, a septa coring problem, or a cap torqued wrong can take a whole sequence offline at 2 a.m. and cost you a re-run of forty samples. What follows is a field guide to the failures I see most often, what actually causes them, and the specific numbers and habits that prevent them.
The autosampler is the only part of an HPLC or GC system that physically handles the sample container. Every injection means the needle pierces the septum, the gripper lifts the vial, and the transport moves it into position. That mechanical contact repeats thousands of times per month. Glass, PTFE, silicone, and aluminum are all consumables in that loop. When one of them fails, the instrument usually gets blamed first. It almost never is.
I keep a simple rule: if the error is intermittent and the retention times are otherwise fine, suspect the vial before you open the service manual. The failure modes below are the ones I have logged most frequently across HPLC, UHPLC, GC, and headspace systems.
Failure 1: septa coring and needle blockage
This is the number one cause of ghost peaks, carryover, and sudden pressure spikes. A septum that cores sheds a small disc of silicone or PTFE into the sample or into the needle. That disc can plug the needle, sit in the injection port, or drift into the column.
Root causes
- Wrong needle gauge against a thin septum. A 22-gauge needle (about 0.72 mm OD) through a 0.5 mm silicone septum leaves almost no margin. The punch shears material instead of stretching it.
- Septum reused too many times. Standard silicone/PTFE septa are rated for roughly 50 to 100 punctures depending on needle sharpness and gauge. Pre-slit septa are rated lower, often 20 to 50, because the slit propagates.
- Needle bent or burred. A burred tip acts like a hole punch. I have seen a single damaged needle core an entire tray of 100 vials.
- High injection-port temperature. Silicone softens above 200 °C. In a hot GC inlet, a standard septum degrades fast. Use a high-temperature septum rated to 300 °C or a molded septum for those methods.
Prevention
Match the septum to the needle and the temperature. For routine HPLC at ambient to 40 °C, a 1.0 mm silicone/PTFE septum with a 0.5 mm pre-slit is a reasonable default for a 22-gauge needle. For GC inlets running at 250 to 300 °C, use a molded or high-temperature septum and replace it on a fixed interval, not on failure. I log puncture counts per tray and swap septa at 80 punctures as a hard stop, which leaves margin before the rated limit. Inspect needles weekly under a loupe; a bent tip is obvious at 10x.
Failure 2: cracked or chipped vial necks
A hairline crack at the neck is the silent killer. The vial seats, the needle enters, and the crack opens just enough to let the sample leak or the pressure escape. You get low recovery, a short injection, or a bent needle when the vial shifts.
Root causes
- Over-torquing crimp caps. Crimping with too much force on a 11 mm aluminum seal distorts the neck. The correct crimp is a controlled squeeze, not a crush. A properly set crimper produces a seal with a flat top and no neck deformation; I check crimp height with a go/no-go gauge and keep it within 0.1 mm of spec.
- Cheap glass with inconsistent neck wall thickness. Borosilicate 33 glass is standard, but wall thickness at the neck varies between suppliers. Thin necks crack at lower torque.
- Thermal shock. Moving a cold vial straight into a hot autosampler tray, or vice versa, stresses the neck. Let samples equilibrate.
- Gripper force set too high. Some autosamplers let you adjust gripper pressure. Too much force on a 12 x 32 mm vial crushes the neck over time.
Prevention
Use a calibrated crimper and check it monthly against a gauge. For screw-thread vials, the 9 mm short-thread format with a GPI 9 mm thread (the industry-standard Glass Packaging Institute thread) is far more forgiving than crimp because torque is controlled by the cap design. I hand-tighten screw caps to the point of contact plus about a quarter turn, which lands near 0.5 to 0.8 N·m on most 9 mm caps. Do not use pliers. Buy glass from a supplier that publishes neck dimensions and holds them to ±0.1 mm.
Failure 3: cap and septum misalignment
When the septum is not centered under the cap, the needle hits the aluminum or plastic edge instead of the silicone. The needle bends, the septum tears, and the injection fails. I have watched a technician load a tray of 200 vials where a third had off-center septa from a sloppy capping station.
Root causes
- Hand-capping at speed. Caps seated by hand under time pressure skew.
- Mismatched cap and vial formats. A 11 mm cap on a 9 mm vial, or a snap cap forced onto a crimp-neck vial, will never seat true.
- Worn capping tools. A crimper or decapper with a worn jaw seats caps at an angle.
Prevention
Use a mechanical capping station or a validated hand tool, and inspect a random sample of ten vials per tray with a straightedge. The septum should sit flush and centered within 0.2 mm. Match formats rigorously: 12 x 32 mm vial with 9 mm short-thread cap, 11 mm crimp vial with 11 mm aluminum seal. When you buy vials and caps as a matched set from one supplier, misalignment drops sharply because the tolerances are designed together.
Failure 4: evaporation and sample loss
In a long sequence, a poorly sealed vial loses volume to evaporation. The concentration climbs, the peak area drifts upward across the run, and your calibration no longer matches. On a 12-hour sequence at room temperature, a loose cap can lose 2 to 5 percent of a volatile solvent. For methanol or acetonitrile in a partly filled vial, it is worse.
Root causes
- Under-torqued screw caps. The PTFE-faced liner does not compress against the glass rim.
- Damaged or missing liners. A silicone-only liner without the PTFE face lets solvent permeate.
- Pre-slit septa left in place too long. The slit opens and stays open.
- Vials filled too full or too empty. Headspace matters. A vial filled to 80 to 90 percent of nominal volume minimizes headspace and evaporation.
Prevention
Use caps with a PTFE-faced silicone liner for aqueous and organic solvents; PTFE is the barrier, silicone provides the seal. Torque screw caps consistently. For volatile analytes, cap immediately after filling and keep the tray at 4 to 10 °C in a cooled autosampler. If you run headspace, use a dedicated headspace vial with a thicker septum and a crimp or magnetic cap rated for the pressurization cycle, typically up to 2 bar.
Failure 5: particulates and column fouling
Glass particles from a chipped neck or a cored septum end up in the sample. They reach the needle, the injection valve, or the column frit. The result is a rising system pressure, a split peak, or a plugged needle.
Root causes
- Chipped vial rims. A vial that was dropped or mishandled has a chipped rim that sheds glass into the sample.
- No filtration. Samples with undissolved material go straight into the vial.
- Degraded septa. Silicone fragments from a cored septum are the most common particulate.
Prevention
Filter every sample through a 0.22 µm or 0.45 µm syringe filter before it goes into the vial. Inspect vial rims and discard any with chips. Replace septa on schedule. If system pressure climbs more than 10 bar above baseline, stop and check the needle and frit before running another injection.
Failure 6: autosampler transport and gripper errors
Modern autosamplers report transport errors when they cannot pick up or place a vial. The vial is usually the cause: a warped cap, an oversized label, or a vial that is not seated in the tray.
Root causes
- Labels wrapped too high. A label that overlaps the cap or the gripper zone catches on the gripper fingers.
- Vials not fully seated. A vial sitting proud of the tray by 1 mm can defeat the gripper.
- Warped caps from over-torque. A distorted cap changes the vial’s outer profile.
Prevention
Apply labels only to the lower third of the vial body. Seat every vial firmly in its position and confirm the tray is level. Use caps with a consistent outer diameter; the standard 12 x 32 mm format has an OD of about 12 mm, and anything outside ±0.2 mm can cause gripper faults. Choose a quality autosampler vial with published dimensional tolerances.
Failure 7: cross-contamination and carryover
Carryover above 0.1 percent of the previous peak is a problem for trace analysis. The vial and cap are frequent culprits: residue on the septum, a reused cap, or a vial that was rinsed but not dried.
Root causes
- Reused caps and septa. Residue from the previous sample sits in the septum.
- Insufficient rinse between samples. The needle wash is too short or the wash solvent is wrong.
- Adsorptive analytes sticking to glass. Basic compounds adsorb to untreated glass surfaces.
Prevention
Never reuse caps or septa. Use a fresh, certified vial for every sample. For adsorptive analytes, use silanized or deactivated glass. Increase needle wash volume and verify carryover with a blank after a high-concentration sample; target below 0.05 percent for trace methods.
Failure 8: light and temperature degradation
Some analytes degrade in the tray before they are injected. Photolabile compounds and thermally sensitive samples lose potency over a long sequence, and the drift looks like an instrument problem.
Root causes
- Clear glass under lab lighting. UV and visible light break down many compounds.
- Warm autosampler tray. A tray at 30 °C accelerates degradation.
Prevention
Use amber glass vials for photolabile analytes and a cooled tray set to 4 to 10 °C. Keep the sequence short or split it. Validate that the analyte is stable for the full run time before you trust the results.
Failure 9: incompatible materials and solvent attack
Not every solvent is compatible with every vial and cap. Strong acids, bases, and some halogenated solvents attack glass, silicone, or the cap liner. The result is leaching, seal failure, or contamination.
Root causes
- Silicone liners with aggressive solvents. Silicone swells in some hydrocarbons and chlorinated solvents.
- Untreated glass with basic analytes. Glass dissolves slowly in strong base, and the surface adsorbs basic compounds.
- Wrong liner for the application. A PTFE-only liner is chemically inert but does not reseal well after puncture.
Prevention
Match the liner to the chemistry. Use PTFE-faced silicone for general HPLC, PTFE-only for aggressive solvents where reseal is less critical, and butyl or specialized liners for headspace. For strong bases, use deactivated glass. Check the supplier’s chemical compatibility chart and run a blank with the actual solvent before committing a sequence.
Comparison checklist: choosing the right vial and cap
Use this table as a decision aid. The numbers are the ones I rely on in practice; confirm against your instrument’s requirements and the supplier’s specifications.
- Format: 12 x 32 mm for standard HPLC autosamplers; 11 mm crimp for classic GC; 10 x 32 mm or 6 x 32 mm for micro-volume work. Match the tray and gripper.
- Glass: Borosilicate 33 for general use; deactivated or silanized for adsorptive analytes; amber for photolabile compounds.
- Volume: Fill to 80 to 90 percent of nominal capacity to control headspace.
- Seal type: 9 mm short-thread screw cap (GPI 9 mm) for convenience and consistent torque; 11 mm crimp for high-temperature GC; magnetic caps for headspace.
- Septum: 1.0 mm silicone/PTFE for routine HPLC; pre-slit 0.5 mm for 22-gauge needles; high-temperature molded septum rated to 300 °C for hot GC inlets.
- Puncture rating: 50 to 100 punctures for standard septa; 20 to 50 for pre-slit. Replace at 80 punctures or on a fixed schedule.
- Torque: Hand-tighten screw caps to about 0.5 to 0.8 N·m; crimp to a controlled height within 0.1 mm of spec.
- Temperature: Standard vials to 40 °C; high-temperature septa to 300 °C; headspace caps rated to 2 bar.
- Cleanliness: Certified low-extractable vials for trace and LC-MS work; verify carryover below 0.05 percent.
For GC-specific work, the GC vial selection follows the same logic but with more attention to inlet temperature and septum material. The instrument vendors publish their own consumable specifications; Agilent’s chromatography consumables and column documentation and Thermo Fisher’s chromatography and sample handling resources are good places to confirm dimensional and material requirements for a given autosampler.
Troubleshooting checklist
When a sequence fails, work through this list in order. It saves time compared with opening the service manual first.
- Symptom: ghost peaks or carryover. Check septum for coring, replace caps, verify needle wash, run a blank. Target carryover below 0.05 percent.
- Symptom: rising system pressure. Inspect needle and column frit for particulate; check vial rims for chips; filter samples at 0.22 µm.
- Symptom: low recovery or short injection. Look for a cracked neck or a loose cap; check crimp height and torque.
- Symptom: drifting peak area across a sequence. Check for evaporation: cap tightness, liner type, fill level, tray temperature.
- Symptom: transport or gripper error. Inspect labels, cap OD, and vial seating; confirm tray is level.
- Symptom: bent needle. Check for off-center septa, warped caps, and burred needles; replace the needle and re-inspect a tray sample.
- Symptom: baseline noise or contamination. Check liner compatibility, glass treatment, and vial cleanliness; run a solvent blank.
Regulated labs should tie these checks to documented procedures. The U.S. EPA SW-846 test methods for waste and materials, and vendor technical libraries such as Restek’s chromatography resources, give you method-specific guidance on sample handling and consumable selection that supports audit-ready records.
Recommendation
If I had to standardize one configuration across a mixed HPLC and GC lab, it would be this: 12 x 32 mm borosilicate 33 clear glass vials with 9 mm short-thread caps and 1.0 mm PTFE-faced silicone septa for HPLC; 11 mm crimp vials with high-temperature molded septa for GC inlets above 250 °C; dedicated headspace vials with magnetic caps for headspace. Buy glass and caps as a matched set from one supplier with published tolerances of ±0.1 mm on neck and OD. Replace septa at 80 punctures, never reuse caps, filter at 0.22 µm, and torque screw caps to 0.5 to 0.8 N·m. Run a blank and a carryover check at the start of every sequence.
Most autosampler vial failures are predictable and cheap to prevent. The cost of a cracked neck or a cored septum is not the vial; it is the re-run, the lost sample, and the hour of troubleshooting at 2 a.m. Treat the vial as a precision component with a defined service life, and the instrument will stop taking the blame for problems that were never its fault.
References & further reading
Related resources from our lab consumables network:
- Autosampler Vial at autosamplerhplc.com
- Vial at vials-filters.com
- Headspace Vial at headspacevialsupplier.com
- Gc Vial at gcvialfactory.com
External references and standards: